Savvy Search Our Blog

Friday, December 16, 2011

Reindeer Food - Classmate gifts!

Pin It
 As I mentioned below, I'm learning how to balance my new life.  My weekends consist of crafts with the kids.  Last weekend my boys and I made reindeer food for 40 of their closest friends...aka their classmates ;)!  It's moments like this, that I miss their tiny European classes (last year they had an average of 8 kids in their class...but I digress).

What is reindeer food, you ask?  Well, its a cute idea that Jo came up with when we lived closer together.  We would make these and sell them at local craft fairs, and it was SUPER popular! 


This is a cute, cheap, way to spread Christmas joy to all your children's friends

What you need:
Equal parts of the following...
  • Krispy cereal
  • Oats/oatmeal
  • Birdseed (I omitted this.  I'd like to think it's because I'm in Africa, but who am I kidding?  There is birdseed here...I'm lazy!)

    Also needed:
  • A few shakes of colored sugar (red and green add to the seasonal cheer)...I ran out of green sugar, and couldn't just run to the supermarket, so I actually made my own...see the savvy tip below!
  • Sandwich bags (preferable those without the zip tops, but you can always cut off the zip, like I had to do this year)
  • Ribbon or yarn (you will see in the above photo, I used ribbon...much cuter.  But this year I used yarn...limited craft supplies and all :)!)
  • Card stock and a cute poem!
 For 40 bags, I used about 3 cups each, and the boys scooped in about 1/4 cup of the mix in each sandwich bag.

Directions:  Place all the ingredients (except the sugar) in a large mixing bowl and stir CAREFULLY to combine.  Scoop about 1/4 cup into a sandwich bag.  Add a few shakes of the sugar to each bag.  Once the food is in the bag, tie off the bag with the poem (printed on card stock and punched hole!).

As the poem says, on Christmas Eve, the kids take the food to the lawn, and sprinkle it for the reindeer to feed on while Santa is placing the gifts.  (Can you tell Jo and I grew up in AZ...no fireplaces, hence no chimneys, hence Santa landed in our back yard!)  This is why birdseed is helpful...the birds will hopefully eat the evidence before the kids realize they have to go check out if the food is gone. 

Savvy Tip:  If you don't have a large yard, careful about just sprinkling it in the road.  Or you may find yourself, in a robe...at 5am...sweeping up the evidence...while explaining to the neighbors what you are doing...YES THIS HAPPENED TO ME, CHRISTMAS 2007!

Our Poem (if you use our poem, you must reference us...thanks for understanding!)
Savvy Tip:  Don't have colored sugar, but you have food coloring?  Make your own colored sugar.  Use 1 cup of sugar and at least 2 drops of food coloring (the more drops, the darker the color).  Add to a ZipLock bag and shake vigorously for about a minute...VIOLA!  Colored sugar!


Wednesday, December 14, 2011

And here are my apologies...


Picture above is property of
MomsPartyCafe/Party Savvy Moms...
Photo by Shelley
 
Merry Christmas all!  The love and support that we have received from pintrest and all of our loyal followers is AMAZING.  As Jo alluded to in our "Apologies for my extended absence" post, we both have had some big news of late!

In her spoiler, Jo mentions Ethiopia, and that, no it is not where her new little angel comes from.  Her crazy little sister moved yet again!  Because of my DH's job, we moved to Ethiopia about 5 months ago.  It has been a wild ride.  I have alluded to our lifestyle in a couple of posts, but now is the time to elaborate.  We have been getting so many new, wonderful, comments and emails.  Those I've responded to may have noticed that I respond "in the middle of the night."  I try and answer emails in the morning, which will be most of our readers' "middle of the night."

My DH's job keeps us on the move.  We move every few years, and we have now lived on 5 continents in 5 countries (in just under 10 years).  Our latest move brought us to Ethiopia.  And yes, WE LOVE IT!  Although it is a 3rd world country, it's not what you imagine.  The people are kind and generous, and the country is just beautiful! 

The other big news is that I have gone back to work full time, for the first time since my two angels were born.  It has been a lot to get used to.  I'm feeling like a bad mom; so all you other working moms out there, send me some love.  I have a really good friend, who is an AMAZING lawyer and an even more AMAZING mom, tell me: "Give it 6 months, and you will completely forget about all the free time you had." Now, really SAHMs, how much free time do we have.  I feel like I just traded in PTA, class-mom, and carpool, for the duties of the office.  It's just that mommy guilt takes over more often now, right ladies?

So, in the last 5 months, along with being a new working mom, I have planned 2 birthday parties, hosted Thanksgiving for 3 families, made "Reindeer Food" (post to come soon), made dozens of brownies (very coveted overseas), and I am in the midst of planning Christmas dinner for 6 families...

Yesterday, to top it all off, I get a phone call on my way home from work, from my 8 year old that says "Mom, little man has had an accident."  And as much as I love Ethiopia, the traffic is beyond horrible.  DH did his best driving and got me home in time to find out the 6 year old had tried to ride our 11 year old lab mix!  The nanny did a great job carrying for him, and he's fine. A big shiner but mostly a bruised ego, and I think there were lessons learned all around. 

Please keep sending us emails, and comments!  We do LOVE them.  We are trying to figure out how to get the word out there more, so send suggestions as well. 

Stay tuned...I have to download some pictures of my weekend project with the kids; and that was making Reindeer Food for all their friends!  I will post pics, recipe and a cute poem to go with it all! 

Thanks again for all the support and love and...

PLEASE continue to come back for you daily cup of Jo and Shelley!


Thursday, November 3, 2011

Are we having turkey (insert my nephew's voice)?


The first week of January, after just moving to the same state as Jo 4 months earlier, I entered my sister's house and my then 6 year old nephew threw himself onto the floor hollering, "Oh no, are we having turkey?!?" We laughed until our sides ached, as we realized throughout November and December, every time we had gathered together, a turkey was the guest of honor, as we gave thanks and filled our bellies.  (Although, not little man's favorite food--can you tell?).

There is more than one way to skin a cat cook a turkey!

If your family is ANYTHING like ours and you have to attend multiple holiday gatherings, try to mix it up a little by preparing a turkey in a new way.  Scared to try a new recipe and afraid you will mess it up?  Here are some savvy tips learned from our mistakes...(DOH...I guess I should have changed names to protect the innocent).

I, Shelley, made my famous Spiced Turkey for Thanksgiving one year. Not only does this turkey recipe produce a very moist and delicious bird, but because of its secret ingredient, while deglazing the drippings, it produces a succulent gravy. What is this secret ingredient? Apple cider.

The year my first son was born, I hosted a Thanksgiving dinner for my family and 3 other families. As many of you have discovered (or will discover) as the hostess, you are usually last to sit down to eat. This was the first time these guests would taste this recipe. All I could talk about was the amazing gravy that is produced and how they would never forget this dinner. I soon discovered I was right, but not for the reason I boasted about.

All the guests sat down to enjoy the meal, slathered their plates with the famous gravy (turkey, potatoes, stuffing) and dug in. From the kitchen, I yelled, "How is it?" . . . "Great!" "Fantastic!" and "Delicious!"

I finished in the kitchen, sat down, made my plate, and poured the gravy. As I take my first bite, I couldn't help but spit it out. I take all the plates away, and ask, "How could you eat this?" What was the fatal mistake? (FYI, I blame mommy brain, as my son was not quite 2 months old yet.) I used apple cider vinegar and not apple cider. In a panic I call up my southern sister and this was her tip (and now our tip to you)...


TIP FOR YOU, the Savvy Mom:
As Jo explained to me, in the south "we fry our turkeys, so there are no drippin's" (hear her accent?). Jo (and now I) always has a packet of turkey gravy mix on hand (99¢ at Kroger). But don't just follow the directions on the back, use Jo's tip, and no one will know the difference!

The packet calls for 1 cup of water. Here is your substitute: cook 1/2 cup of white wine until it reduces to 1/4 cup. Combine the 1/4 cup of reduced wine with 3/4 cup of chicken broth (canned works perfect). Then follow the packet directions. So whether you fry your turkey, ruin your gravy, or have turkey takeout left over from the restaurant (don't laugh, our mom did this our entire life) you will have a succulent gravy, from an envelope.


Thursday, October 13, 2011

Time to start planning for your Christ-Centered Christmas

C
It is time to start planning for your Advent celebration. Please take some time to re-visit this post from last year on my Annual Advent Workshop.

This year Advent begins on November 27th.  I am starting to put together this year’s big plan—although it still feels like August outside and I am just not feeling it. It doesn’t really help that the house across the street has been under construction for the last month and all the clanging and banging is starting to give me a headache. I think I need a little prayer to get me in the mood ....................................................................................................................................................................................................... (that is me saying a quick prayer).

My craft project “formula” is: three hand-made crafts to give away (My guests leave with Grandma, Aunt Shelley, and Uncle Mike’s Christmas presents ready for gifting--no Chinese foamcore kits please) + one Christmas decoration for the whole family to keep + 1 simple craft for each child to take home.

Christmas decoration for the whole family to keep

Last year I found the cutest paint-your-own, ceramic Nativity kits on sale after Christmas for 90% off.

I am a little nervous. I think they are a little too complicated for the short timeframe we have. I am also picturing little painted fingerprints all over my furniture. I think I might chicken out and let everyone just take it home as a parting gift. I will let you know how it goes.


Simple craft for each child to take home

I found these cute bracelets on Amazon.com. I have done a similar project before. The kids loved it. However, the kit came with plastic string. It was too difficult for the kids to tie. I am planning to have some twine and elastic on hand just in case.


Two down, three to go . . . Stay tuned for more!


Halloween Costume Contest!

Tuesday, October 4, 2011

Silver Pumpkin Hunt

Do you Fall Festival? The morning air is crisp and the leaves are turning colors. In our house that means it’s time for Fall Festival. In these parts, fall festivals are a common community, school PTA, or church event for fellowship and fundraising.


One fun event to try at your Fall Festival is the Silver Pumpkin Hunt. Simply spray-paint small pumpkins and hide them (some in plain sight) around your Fall Festival. Those who find a pumpkin may turn it in for a prize. You could also have your hunt Easter Egg style, with a scheduled start time and age limits. Happy Hunting!

Friday, September 23, 2011

Fake a Homemade Costume

As a young Girl Scout, I learned to sew. Both Shelley and I took classes in sewing, quilting, and knitting (What can I say, we're dorks). In fact she makes the most amazing crochet animals. (Hey Shelley you should post photos of those). I even own my very own Martha Stewart recommended sewing machine. It cost way too much money and was a tough sell to my husband 15 years and several tax brackets ago. I wooed him with promises of never having to hire out his tailoring and mending or pay retail for curtains and bedding again—it would practically pay for itself.

After the birth of our 3rd child, my craft room became a nursery and I haven’t seen my sewing machine since. Frankly, sewing projects take space, time, and patience, all of which I no longer have. (It’s sad how I loose a little of myself with each new child, but that is a conversation for another day. I know, not a super mommy thing to say, but tell me you haven’t felt the same way at least once in your life).

Our dear friends throw the best Halloween party every year—costumes mandatory. One of the highlights of my 11 year old daughter’s life was winning the “Best Costume” award at their party when she was 6. She has been trying to regain her crown every year since. Each year she picks the theme and the two of us create the costumes together—after convincing (and sometimes bribing) her brothers to participate.

I stopped buying costumes years ago, partly because I’m cheap and partly because costume manufacturers have decided that our daughters are never too young to start dressing in slutty little costumes. Last year Superstar (my pet name for aforementioned daughter) chose the theme Alice in Wonderland. I started my search online and this is what I found.

OVER MY DEAD BODY! What are these companies thinking? And what kind of parent is buying this? They wouldn’t be selling it if someone wasn’t buying it. Cyber Mommies, please tell me I am not alone on this.

I searched everywhere and could not find an age-appropriate version of this costume. It was time to fake it. No one knew. In fact, they all thought that we spent a ton of money. Here is my no-sew creation:


Darling Husband: I purchased the wig. The top hat belonged to my grandfather. The coat, scarves, vest, messenger bag, gloves, socks, and shoes came from my closet. Total cost $14

Superstar: I purchased the dress at an upscale consignment shop for $10 (Which she wore again on Easter Sunday). I ordered the apron from Ebay for 4.95 (and it makes an appearance every time we bake cookies). Superstar made a “Drink Me” bottle and “Eat Me” cake that she carried in a little purse.

Woobie : I purchased the hat, nose, and clock at the local party store for $13. Everything else was from our closet.


Total Price: $41.95, Winning the “Best Costume Contest”: Priceless


FYI: I dressed as the Queen of Hearts. I have been forbidden from posting photos of the other children and I can’t find one of myself without them. I absolutely respect their request and will do a better job of taking photos this year.

Stay tuned for this year’s totally top secret costumes—the costume contest business is cut-throat.

Apologies for my Extended Absence

Thank you so much for all your kind email messages. I apologize for my unexplained neglect of the blog. After a lengthy conversation with Shelley yesterday (It was two hours and I used up all my nap-time me-time, but it was totally worth it.) I have decided that it’s time for me to return from my unofficial leave of absence. Thank you Shelley for filling my size 9 ½ shoes (Although, borrowing each other’s shoes is not exactly new to us.), holding down the fort, and responding to email messages.

I often tell my children that you never really know what is going on in other people’s homes. That is why you should never judge others. Seriously, how many times have you been totally shocked when the “perfect” neighborhood family is split apart because of cheating and financially monkey business? I must be the world’s worst judge of character because I NEVER see that stuff coming.

Anyway, there is no cheating or financial monkey business going on here (At least none that I know of and please don’t tell me if you do. Denial works much better than Zoloft.) However, we have been going through some major life changes. We are in the final stages of adopting our 4th child. It has been several months of endless, sleepless nights, court dates, room decorating, new sibling rivalry, and life. Even Wonder Woman can’t hold it together all the time—although, she always looks good trying.

Over the last few months I hosted two children’s birthday parties, a 4th of July picnic, and a back to school party-- photos and details to follow. I totally stole Shelley’s Toy Story party--games, cake, alien cupcakes for school, etc.. She even shipped me the decorations. It was the easiest party I have ever thrown. Thanks for all the ideas!

I am knee-deep into Fall Festival and Advent Workshop. Stay tuned for details. I am sure that Shelley will be updating us soon on her recent life changes. Spoiler Alert: Ethiopia (that is all I am going to say and no, that is not where our new child is from).

Thursday, September 1, 2011

Back-to-School Party...

Here's an idea, why don't you schedule the party like a school day?  As soon as the kids arrive, you can split them into groups, and have them rotate throughout the party.  We suggest decorating in simple primary colors; red, blue, and yellow.  As the "students" arrive to your party, have them randomly pull a color from a basket.  This will be their homeroom color.  They then gather at their designated homeroom spot.  As the party continues, ring a bell between the following sessions... PE (games and activities), Art (arts and crafts), lunch time (refreshments), and recess (free play).

Here are some ideas for games and arts and crafts!

Games:
  • paper airplane contest 
  • twister
  • Simon-Says
  • Pencil Walk: (Just like the traditional Cake Walk game but with pencils as prizes instead)
  • Teacher’s Bag:  (Get a paper lunch bag and put in various small items in it, like paper clip, eraser, chalk, gluestick, etc.  Let each person close their eyes and try to feel and guess what is in the bag)
Arts and Crafts:
  • Decorate a Pencil Box: Buy some inexpensive plastic pencil boxes and use stickers, permanent markers, to decorate a pencil box. Favors like pencils, erasers, stickers, can be given at the end of the party together with the pencil box as the perfect Back To School favor.
  • Make your own bookmarks
  • finger painting
  • oragami
  • clay/play-doh

Suggestions for free play:
  • Four square
  • relay races
  • water guns/balloons
 Stay tuned for decorating ideas and party menu!


    Wednesday, August 31, 2011

    Start a new tradition

    The first day of school is upon us. For many of us it means a return to car pool, after-school activities, homework, and a long farewell to “me time”. I like to mark the first day of school with another tradition—Mommy’s Morning Out. After you have taken your back-to-school photos, dropped off the kids, and secretly spied on them through the window to make sure they are alright (although, we are all secretly and selfishly hoping they will have that “I miss my mommy moment”) invite the other mommies out to coffee at your favorite local coffee house (insert plea here for supporting locally owned business).

    This is the easiest party to organize. All you have to do is send out the invitations. Everyone will purchase their own food and beverages. You will all have things in common and the conversations will flow uncontrollably. If it is a success, try to make it a weekly event. When my husband complains about the $10 a week I am spending, I reassure him that it is cheaper than a trip to the psychiatric hospital.

    Sunday, May 8, 2011

    Teacher gifts...continued...crayon wreaths

    Pin It
    I have to bring this up again, since my kids still have 3 weeks of school left, and I'm still dealing with end of the school year madness :)...By the way, I'm glad you had fun in Disney, Jo, but am SUPER jealous that as you were riding rides and having tasty food, I was still doing carpool, and PSG...I digress....
    I made these crayon wreaths for the teachers.  I made a total of 4, but am sharing just 2...one with the longest name, and one with the shortest name...

    What you need:

    12" embroidery hoop, or basketry hoop
    8" embroidery hoop, or basketry hoop
    (instead of the embroidery hoops, you can also use the styrofoam wreaths.  I found them a bit thick, so I cut the in half and then painted them.  My friend also had a savvy tip and you can cover the styrofoam in a nice clean fabric.  Mine were already painted...maybe next year)
    box of 64 crayons
    ribbon
    hot glue
    Stickers

    Directions:  Place the 8" hoop in side the 12" hoop with equal   distance between all edges.  Arrange the crayons along the 2 hoops.  Hot glue the crayons to the hoops. 
    Savvy Tip:  Keep the unglued crayons arranged on the hoops.  It will keep the spacing. 

    Tie the bow around the 2 crayons that you want at the top.  Create a separate loop and glue the edges together to create the hanging loop.  Place as many (or as little) stickers as you like.  Personalize with the teacher's name, if you'd like.  Super easy :)!


    Thursday, May 5, 2011

    ¿Qué hay que beber?...

    Pin It

    What will you have to drink?  Today, I'm going to talk about, margaritas (of course), Agua Fresha, and Mexican beer!

    Margaritas:
    Of course, no Cinco De Mayo fiesta would be complete without margaritas!  There are a few options.  If you haven't been able to tell, one of my favorite food genres is Mexican.  We eat Mexican food A LOT.  Also, my all time favorite drink is the margarita.  I like them made from scratch, from a alcohol-included mix, and virgin from a mix; I like the traditional lime flavor, and strawberry; I like them frozen and on-the-rocks.  And I am here to provide you with what you will need to make all of them, if you like!

    Margarita's from scratch (this recipe was given to me by a very dear friend, and it's the only scratch recipe I use now)...yes I'm sharing (see Jo, your little sister DOES share LOL):

    Mix together:
    • 2 parts tequila
    • 1 part cointreau
    • 1 part-fresh squeezed lime juice
    • 1 part limeade
    • pinch of salt
    Rim your glasses with salt (See the Savvy Tip below)
    Mix all the ingredients in a pitcher, and chill until ready to serve.

    Savvy Tip:  To create the restaurant styled salt-rimmed glass, take a lime wedge and rub around the edge.  Turn the glass upside down and twist through a pile of salt (coarse salt works best, like kosher salt.  You can also sometimes find a tub just for making margarita salted glasses).   If you are making strawberry margaritas, you can do the same thing but substitute sugar for the salt.

    Strawberry Version:
    Use all the same ingredients as above, but you will rim the glasses with sugar. 

    In a blender combine one package of frozen strawberries, thawed.  Cover and blend until smooth.  If you want, strain the mixture to remove seeds.  Add the blend to the margarita mix.

    By the way, you can really make ANY fruit flavored margarita.  Just substitute the strawberries with your favorite fruit: mango, blackberry, raspberry, etc. 

    On-the-Rocks vs. Frozen
    I have found this is all based on preference.  I am an equal opportunity margarita drinker, but know people who will only drink frozen or only drink on-the-rocks.  Either way, you will have it covered.


    On-the-Rocks:  Use the above recipes or below mixes.  Place the desired amount of ice in a glass, and then pour your mixture over the rocks...DONE!

    Frozen:  Place the desired amount of mixture in the blender and add a few handfuls of ice.  Blend to your desired thickness.  More ice = thicker margarita!  DONE!

    DISCLAIMER:  We are not/not here to promote drinking.  Everything can be enjoyed in moderation, and if you do plan on drinking (even just ONE drink) please, please, please have a designated driver (DD).  My husband and I take turns.  If he wants to drink at a certain event, I drive and vice versa; just one way to be safe.  And we certainly do not tolerate under age drinking, so if you are under 21...please enjoy the virgin versions!

    Virgin Margaritas:

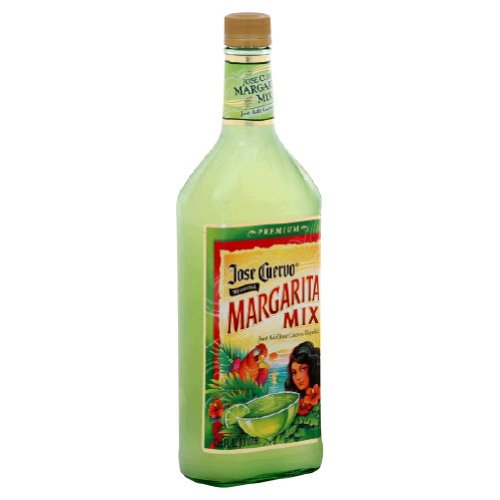
    José Cuervo makes a great mix.  (Again, we are not promoting drinking, and I'm certainly not promoting any brand in particular, this is just one I particularly enjoy).  This mix is made to mix with Tequila.  But, you can use it as is.  You will now have a great alternative for those who don't drink, or who are being responsible enough to be the DD.


    José Cuervo also makes a FANTASTIC mix, alcohol included:


    And, if strawberry is you flavor of choice, both the above come in strawberry.

    OK, I think we have the margarita area covered...let me know if you think I've missed something, or have questions!

    Want a non-alcoholic beverage, that still stays true to your theme?  How about...

    Agua Frescas

    Agua Frescas are "fresh waters" that are infused with fruits, flowers, grains or seeds.  Mix one of these light, healthy sippers at your party.  They are super easy to prepare.

    Based on the fruit you choose the recipe (water level mainly) changes.  I'm going to provide you with 3 versions:


    Strawberry Agua Fresca:
    6 cups fresh strawberries, hulled and halved
    4 cups cold water
    1/4 cup freshly squeezed lime juice
    1/4 cup honey
    ice cubes

    In a blender combine half of the halved strawberries and half of the cold water.  Cover and blend well.  Strain mixture through a fine-mesh sieve into a pitcher.  Discard solids.  Repeat with the remaining strawberries and remaining water.

    Stir in lime juice and 1/4 cup honey.  Serve immediately over ice or chill until ready.

    Orange-Papaya Agua Fresca:
    4 cups peeled, seeded and cubed ripe papaya (About 3)
    1 1/2 cups freshly squeezed orange juice
    1/4 cup freshly squeezed lime juice
    1 1/4 cups cold water
    2 Tablespoons honey
    ice cubes

    In a blender combine papaya, orange juice and lime juice.  Cover and blend until smooth.  Strain mixture through a fine-mesh sieve into a pitcher.  Discard solids.

    Stir in the water and honey.  Serve immediately over ice or chill until ready.

    Watermelon Agua Fresca:
    1  6 to 8 pound seedless watermelon (aprox. 13 cups)
    2 cups cold water
    2 Tablespoons freshly squeezed lime juice
    2 Tablespoons honey
    ice cubes

    Cut the rind from the watermelon and discard.  Cut the flesh into 2 inch cubes

    In a blender combine about 1/3 of the watermelon cubes and 1/3 of the water.  Cover and blend until smooth.  Strain mixture through a fine-mesh sieve into a pitcher.  Discard solids.  Repeat twice with remaining watermelon and remaining water.

    Stir in the lime juice and honey.  Serve immediately over ice or chill until ready.

    Beer:
    Finally, say hola to Mexican beer.  Here is a small list of some Mexican beer you may want to consider purchasing for your fiesta:
    • Corona
    • Dos Euquis (XX) Amber
    • Negra Modelo
    • Pacifico Clara
    • Tecate


    Time to think of your menu...

    Before you begin to plan, you have to keep a few things in mind.  How many people are coming?  (Remember, if you haven't heard from all your invitees, it's OK to pick up the phone, or send a quick email to see if they plan on attending.  Just let them know, you are in the menu planning process and want an accurate count)  What type of party are you having? a sit down dinner? informal buffet? just snacks and cocktails?  It is COMPLETELY up to you.  Jo and I have done all of the above.  But, in order to have a successful menu, you have to know what you are cooking.  We are going to provide you with some ideas, and recipes, but by no means is this an all inclusive list, and you don't even have to use them.  If you have some recipes you would like to share, PLEASE DO!  We are always willing to try some new savvy recipes.

    Growing up in the southwest, I often have Mexican themed food at my parties (whether it's Cinco De Mayo, or Game Night).  A huge success, and very little work is a...

    TACO BAR!

    Here's what you need, all suggestions:
    • Taco shells (either store bought, or handmade)
    • small flour tortillas (for those who like the soft tacos)
    • assortment of meats (here are some ideas: ground beef, shredded beef, pork and/or chicken, diced chicken, etc)....stay tuned for recipes
    • shredded cheese 
    • sour cream
    • guacamole...stay tuned for recipes
    • salsa...stay tuned for recipes
    • shredded lettuce
    • diced tomatoes
    All you have to do, is set this up buffet style, with the shells/tortillas at the beginning, the meat in the middle (preferably in a crock pot/slower cooker to keep warm), and all the fixings at the end.  Your guests make their own plates, and enjoy!

    Here are some tips for sides:
    • Refried beans:  Don't get scared!  I NEVER make these from scratch, but here are some Savvy Tips to make your beans leaving your guests asking for the recipe (I'm serious...I'm always asked...it will be up to you if you divulge my your secret).  Place the canned beans in a pot and warm on the stove.  Add garlic powder (to taste, I use probably more than the average Joe José) and a generous amount of shredded cheese (I use cheddar).  Stir to combine, and heat through until cheese melts.  Sorry I don't have an exact recipe, I make this weekly, and just eye ball it.  You can never have too much cheese or garlic (at least in our family).
    • Black Beans:  Another dish, where I'm always asked for the recipe, and I actually do have a recipe for this LOL.  This is another staple dish in my family (outside Mexican themed nights) because my VERY picky 4 year old will actually eat these:  

      Ingredients:
      1 Tbsp olive oil
      3/4 c. onion, chopped fine (Savvy Tip...I use frozen onions...shhhhh...they're in the frozen section)
      1/2 c. green pepper, chopped fine  (Again...I use frozen peppers...shhhhh...sometimes you can find them in frozen section WITH the onions included)
      1 c. diced tomatoes (I use canned, drained)
      1 can (15 oz.) black beans, drain and rinse
      1/2 tsp thyme
      1 tsp garlic salt
      3 Tbsp cider vinegar
      Dash of Tabasco (optional...but even my 4 year old doesn't object)

      Directions:
      In large skillet over medium heat, warm olive oil. Cook onion and green pepper until crisp tender. Stir in tomatoes, beans, thyme, and garlic salt. Cook 3 minutes; add vinegar and Tobassco. Cook for 5 minutes. 
    •  Rice...ALWAYS a necessity for Mexican food.  There are many types of Mexican rice, but here is Jo's secret...cook it with salsa.  We also have another Savvy Tip when cooking ANY white rice.  Substitute water with CHICKEN BROTH.  We promise, promise, promise, promise...you will never cook your rice with water again.  Here is our white rice recipe:

      For a serving of 4 (You will have to adjust to how much you want for your party):
      1 cup uncooked white rice (I personally LOVE Jasmine rice)
      2 cups canned/boxed chicken broth

      Directions:
      Bring chicken broth to a boil.  Add rice to the boiling broth, and stir with a fork.  Return broth and rice to a boil, and stir once more with a fork and cover.  Reduce to a simmer, and cook for 15-20 minutes.  Every stove top is different, for example, it takes my rice 17 minutes :)!

      MEXICAN VERSION:
      Substitute 2 cups chicken broth with 1 1/2 cups chicken broth and 1/2 cup salsa (either jarred or homemade).  Follow the same directions...we don't think you will be disappointed.  Both Jo and I have tried MANY Mexican rice versions, and by far Jo's is the best!
    • Shredded Meat (this can be made the day before, and just reheated in a crock pot for the party):  Whether I use, chicken, pork, or beef, I prepare it all the same way.  For the beef/pork find a boneless roast you like, for the chicken, I always use chicken breasts, but that's just my preference.  This recipe is like the above refried beans, in that I don't follow an exact recipe, but it really is hard to mess up.  PLEASE contact me if you have questions.

      Ingredients:
      Protein of choice (beef, chicken, pork)
      A couple cups of diced onions
      2 cans of green chilies
      Salsa, either homemade or jarred

      Directions:
      Wrap your protein of choice in aluminum foil and place in a shallow baking dish (to catch any leaks).  Place in a preheated oven of 300 degrees.  Cook for 4-5 hours. 

      Right before the meat finishes cooking, in a large pot saute onions and green chilies in a couple tablespoons of olive oil.  Once the meat is finished cooking, place in the pot with the onions and green chilies, and shred with 2 forks.  Add your salsa, and stir to combine.  That's it!
    • Ground beef:  If you choose ground beef, brown your beef in a skillet.  Drain the fat.  Add onions, green chilies and salsa, and combine.  That's it!
    • Carnitas:  Mexican for SUPER yummy pork!  Check out onelovemama's blog for a mouth watering recipe leaving you wanting more.
      Here are some other recipes to keep in mind:

      Salsas:

      Salsa Picante
      Ingredients:
      4 medium tomatoes
      1 medium onion
      1/4 cup cilantro
      1 to 2 fresh jalapenos or serrano chili peppers, seeded and halved (Savvy Tip:  Handle peppers with gloves.  When I was in high school, I was making salsa, and handled the peppers bare handed, and then touched my face.  My face was on fire for HOURS!)
      2 cloves garlic, minced (I use jarred)
      1/2 cup chopped green sweet peppers
      2 Tablespoons lemon juice
      1 Tablespoon fresh oregano or one 1 teaspoon dried
      1 bay leaf
      1/2 teaspoon sugar
      1/4 teaspoon salt

      FYI...although I am ALL about the frozen onions and peppers in the above recipes, I always use fresh when making salsa!

      Directions:
      Place tomatoes in a blender or food processor.  Cover and blend or process until coarsely chopped.  Add onion, cilantro chili peppers, and garlic.  Cover and blend or process until finely chopped.

      Transfer tomato mixture to a medium saucepan.  Stir in sweet pepper, lemon juice, oregano, bay leaf, sugar and salt.  Bring to boiling; reduce heat.  Simmer uncovered about 30 minutes or until salsa reaches desired consistency.

      Discard bay leaf.  Cool salsa slightly.  Cover and chill for 1 hour up to a week before serving.


      Salsa Verde (my personal favorite!)
      Ingredients:
      12 ounces fresh tomatillos, husks removed, or one 13 ounce can tomatillos, rinsed and drained
      What are tomatillos:  Also called Mexican green tomatoes, the fruit within the tomatillo husk, is firm herby and slightly lemony. 
      1/4 cup cilantro
      2 Tablespoons finely chopped red onion
      1 fresh jalapeno or serreno chili pepper, seeded and finely chopped
      1/4 teaspoon salt
      1/4 teaspoon sugar

      Directions:
      Finely chop tomatillos.  In a small bowl stir together chopped tomatillos, cilantro, red onion, chili pepper, salt and sugar.  Cover and chill for 4 hours to 3 days before serving.

      Guacamole:

      Chunky Guacamole
      Ingredients:
      2/3 cups finely chopped, roma tomatos
      1/4 cup sliced green onion
      2 Tablespoon lime juice
      1 Tablespoon olive oil
      1 to 2 garlic, minced (again, I used jarred)
      1/4 teaspoon salt
      1/8 teaspoon ground black pepper
      1 fresh jalapeno or serreno chili pepper, seeded and finely chopped (optional)
      2 very ripe avocados, halved, seeded, peeled and coarsely mashed

      Combine all the ingredients together and stir together.  Savvy Tip:  SAVE YOUR AVOCADO PITS...once your ingredients are combined, add the pits to the guacamole.  This will prevent you guacamole from going gray!

      Stay tuned tomorrow for drink ideas, from the coveted Margarita to Agua Frescas.

      Wednesday, May 4, 2011

      Teacher Appreciation or Teacher gift? You choose!

      Pin It

      This week is Teacher Appreciation Week. Last night, my sons and I made candy topiaries. Since Jo has also started our dialogue regarding the end of the year, and room parties, you can also do this for the party. They make great table center pieces. If you have more than one teacher (say a main teacher and an aide) then you have your gifts AND decorations.

      A candy topiary tree can be created using a variety of candies. They really make great gifts. Every time I make one, the first response is "I've never seen anything like this." Unlike flowers, they won't wither away. In fact, the best part of a candy tree topiary is that not only does it look attractive, you can eat it.

      What you need:
      • Candy of choice (not too much, because otherwise you will eat the extra as you blog)
      • wooden dowel 
      • Styrofoam ball or cone to decorate
      • smaller Styrofoam ball, cut in half, for the bottom (or plaster of Paris... but with this option, the pot can not be reused)
      • Hot glue
      • Flower pot
      • Paint pens, glitter glue, or other crafts to decorate.
       Instructions:
      1. Center the end of the wooden dowel at one end of the Styrofoam ball. Push the dowel into the ball firmly. Do not push it all the way through, however push it far enough so that the weight of the candy on the ball later will not cause it to fall off the dowel. You can also put some craft glue on the end of the dowel to ensure it stays in the Styrofoam ball.  Wrap the dowel with the ribbon, using the hot glue to hold in place.

      2. If using plaster of Pairs, mix the plaster of Paris according to package directions in the bowl. Pour the mixed wet plaster into the flower pot or cup you are using for your topiary. It should come almost to the top but not quite. Take the end of the wooden dowel that does not have the ball on it and push it into the wet plaster. Be sure it is straight and let the plaster dry.

      3. Place a small spot of glue on the piece of candy and place on the ball. Hold in place a few seconds until it dries. Continue with each piece of candy until the ball is covered in the desired design. A popular method is to start placing the candy at one end and work your way down, but you can put the candy on in any way you like.


      4. Fill the rest of the flower pot with more candy (I used chocolate mini bars this last time---get it?  for dirt?), colored pebbles or Easter grass to cover the halved Styrofoam ball or plaster of Paris.  If you like, use the paint pens, glitter glue, acrylic paints, etc. to paint a design on your flower pot as a finishing touch.

       Let us know what other ideas you have for teacher appreciation gifts.  Here are some more that Jo posted on FaceBook and there are some other ideas to the right in the Savvy Etiquette box:
      • Pick up an extra latte on your way to school and deliver it with a note card that says “A special thank you . . . For providing an extra boost of energy to every part of our children’s education!”
      • Ask the local coffee shop to donate a carafe of coffee and a platter of scones for the break room. Make a giant card out of poster board to display next to the treats and have the children sign it. Include a small sign that says “Provided by (insert coffee shop name here)” as a thank you for the donation.

      Related Posts Plugin for WordPress, Blogger...